
Showing posts with label kids. Show all posts
Showing posts with label kids. Show all posts
Thursday, April 19, 2012
Little Boy's Apron

Tuesday, April 10, 2012
Boy's P.j. Pants


 This probably took less than an hour. They are so cute! I might make a pair for my toddler and maybe some for myself! Thanks Prudent Baby! You can find the tutorial here.
Saturday, January 14, 2012
Play Kitchen: Before and After
 |
| Before |
 |
| After |
I've made some progress on the play kitchen. It is almost completed. After many coats of paint, and a few accessories, the boys can finally play with it. It still needs a knob for the faucet and a sink bowl, but I'm pretty happy with it. I love the wooden pizza set and the fruit and veggies I bought. Velcro holds the slices together, and they make a realistic cutting sound when you use the play knife. I made a utensil holder out of an old can and some scrapbook paper. The oven rack was cut to size by my husband. It came from one of my old cooking pans. I used duck tape to cover the edges to keep it safe for the kids. I sewed a little towel and potholder out of some scrap material. I am also working on some felt food that I will post later.
 |


Friday, January 13, 2012
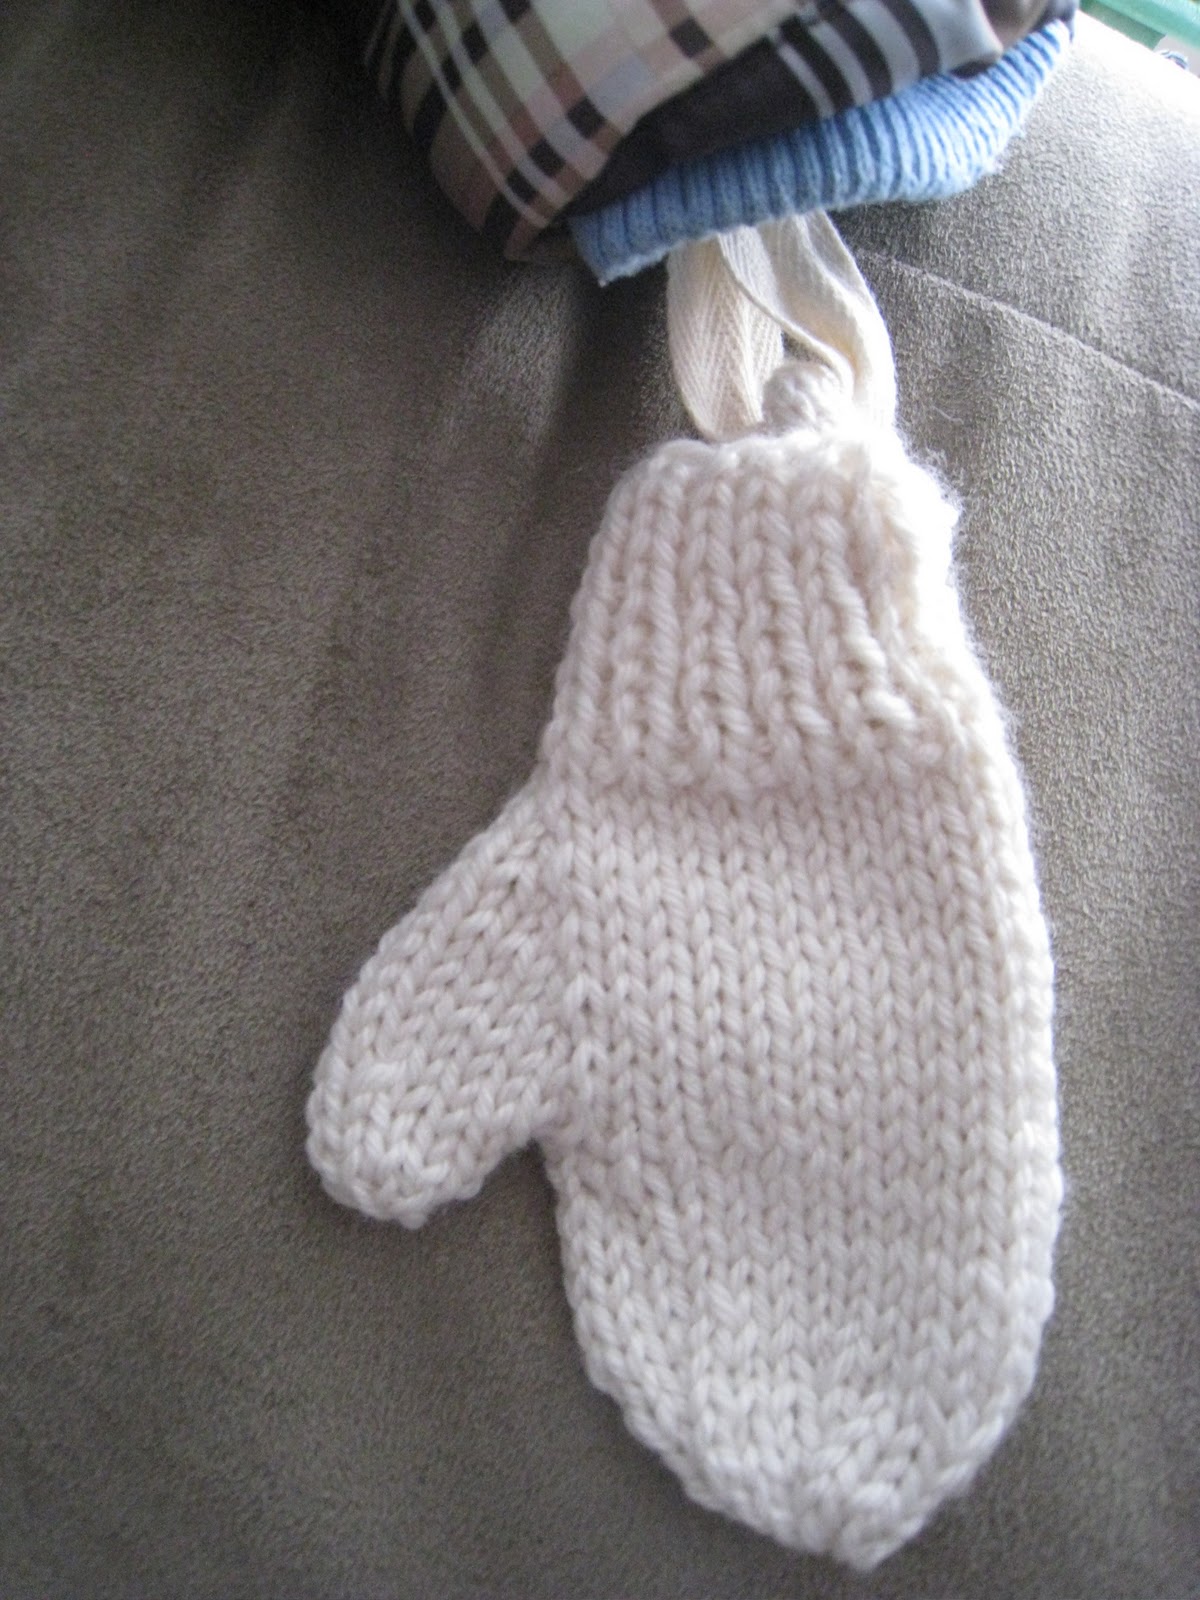
Mitten Tethers

I love toddler coats that have built-in mitten tethers. I think all kid's coats should come with these. And all mittens should have little loops attached. With my first son, I didn't have to worry about him taking off his mittens and losing them. He was pretty good about keeping them on. My second son (the little stinker) loves to take his off when I'm not looking, and drop them who knows where. I don't have time to backtrack across Walmart to find them. So I made these tethers from cotton tape and sew-on snaps. I sewed little loops to the store-bought mittens, and I knitted I-cords to the handmade ones. Another way to make loops for the knitted mittens, would be the crochet a small chain and attach it. You can use ribbon, or any narrow strip of material to make the tether. I could have just bought some trusty elastic mitten clips, but I already had these supplies around my house, and I needed them in time for this recent snowfall.


Wednesday, November 16, 2011
Cupcake Decorations


Pinwheels

Here's how I do pinwheels:
Supplies
double-sided scrapbook paper
ruler
scissors
push pin
pinwheel kit, or a straw and a small brad


Asher's 1st Birthday

Asher's birthday party did not have a real theme to it, but I knew I wanted to do something with pinwheels. I thought they could double as decorations and favors for the younger kids. It worked out perfect cause it was super windy that day. I incorporated the birds because I had a ton of leftover die-cut birds from my wedding favors. I know...I'm a pack rat. I feel so guilty throwing certain things away, if I know I could use it for something else some day. I found lots of tutorials for pinwheels, but the ones I tried were really stiff and didn't spin freely, so I ended up ordering a pinwheel kit from Oriental Trading Company. I will post how to make simple pinwheels out of double-sided scrapbook paper later.

For the Banana Cupcakes with Honey-Cinnamon Frosting go here. The fudge cupcakes are from a box, but I took vanilla frosting and stirred a little peanut butter in. It was very yummy.


Tuesday, November 15, 2011
Aiden's 5th Birthday

 I got the idea for this guitar cake from Parents magazine. It was made from a 9 x 13 slab of cake. Cutting, piecing it together, and frosting it was a little stressful, but my son went nuts over it. The decorations are made from candy. I got the instructions from a recipe card that came in the magazine, but when I tried to look it up on the Parents website, I couldn't find it. I did find a really cool version on the Betty Crocker website. You can find the guitar cake here. I love these chinese take-out containers for favor boxes. You can buy these at Michael's craft store. My husband jokes that they look like favors for a vampire's birthday because of the colors. Inside the favor box, I included a candy maraca and a toy harmonica. Tied to the box, is a rock candy sucker. I really wanted custom birthday invitations, but they are so pricey. I usually make my own out of whatever scrapbook paper or card stock I have around the house.
 |
Tuesday, November 8, 2011
Play Kitchen Revamp
A generous friend gave me play kitchen to fix up. I was so excited when I saw it because my son loves to play "chef". It needs a little paint and a few adjustments, but it has lots of potential. I already have tons of ideas. Here are some before pictures. As I start working on it, I will show the progress.


Subscribe to:
Posts (Atom)